Rehab tip of the day

Rehab tip of the day

Developer · Bellefontaine Ohio · Member since 2016 · 373 posts · 219 votes

Let’s start a list of issues with the property it self and how we fixed them:

1. Painted over wall paper - used a belt sander with 60 grit, then a skim coat mud, then normal paint prep.

2. Not enough matching doors - replace closet doors with bifold louvered doors, move other doors around.

3. Always paint before putting in new flooring, this saves covering the floor, and top down if more than one color.

4. Buy appliances from a used appliances store.

5. Change to a non key entrance system, maybe like a motel, this saves changing locks, and tenants making keys for all their buddies.

6. A security camera system outside can make you money by allowing you to charge for pets, prove someone was the party who did the damage, more people than on the lease. And you can list it as a feature.

7. Electric baseboard heat is a cheap way to replace an old furnace that feeds several units which you pay for.

8. Wainscot covers a lot of lower wall issues.

9. Acrylic tubs never rust.

10. Leak detector water shut offs can save a lot of damage that would not get reported.

11. New Plastic windows never need painted.

12. Remove old chimneys that leak, and repair roof, assuming they are used anymore.

13. Add coin op washer and dryer, it’s a feature and a money maker, first one I did returned my investment in less than a year.

14. Mini storage on same or close by property.

Please add all that you can here. Hopefully you learn on my dime, and I learn on yours.
52Reply
727 views

Most Popular Reply

Rental Property Investor · Concord, NC · Member since 2016 · 1k+ posts · 3k+ votes
5y

Ugly unframed bathroom sheet mirrors - Pick up enough trim to cover the border.  Notch trim around wall supports. Miter cut corners and attached trim to mirror with caulk. Paint.  Looks 10x times better

See this reply in the discussion

145 Replies

Jump to latestLatest
  • Banker · Saint Clair Shores, MI · Member since 2011 · 131 posts · 53 votes
    5y
    Steven, thanks enjoyed the post.
  • Developer · Bellefontaine Ohio · Member since 2016 · 373 posts · 219 votes
    5y

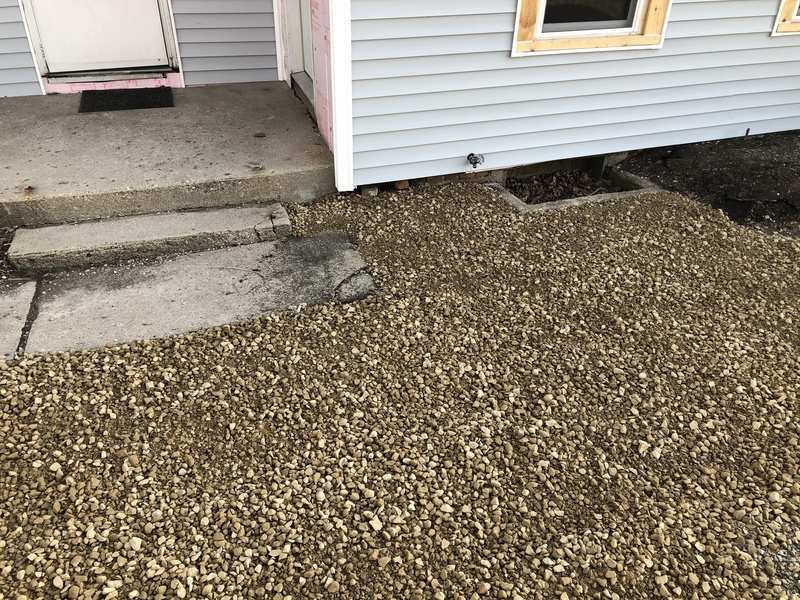
    Extending the parking area right up to the house, means no weed eating, just some weed killer a few times a year.

  • Developer · Bellefontaine Ohio · Member since 2016 · 373 posts · 219 votes
    5y

    Put picture hangers in and tell tenants to use them instead of putting nails in the walls. I have had them drive big framing nails in, just for a little picture.

  • Developer · Bellefontaine Ohio · Member since 2016 · 373 posts · 219 votes
    4y

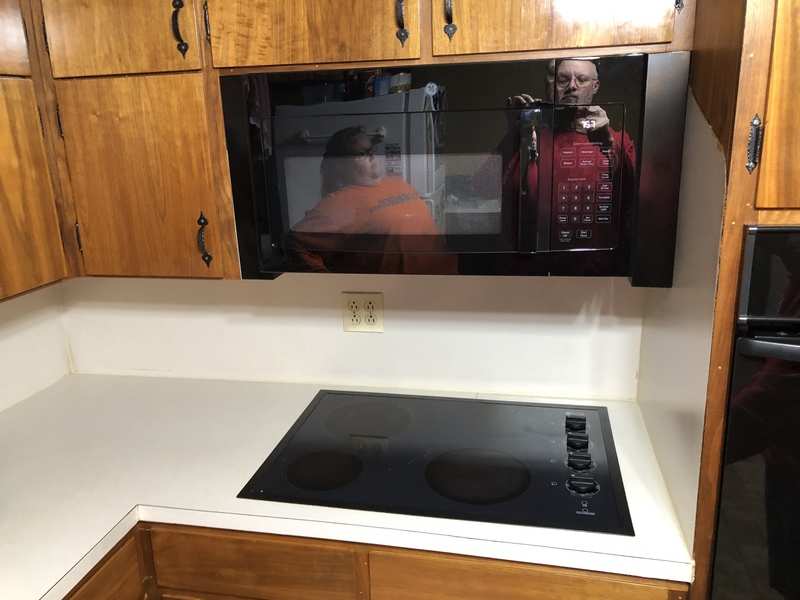
    on some older homes the fans over the stoves are 36” wide, and microwaves over stoves are 30” wide. Turns out amazon sells some little filler panels.

  • Developer · Bellefontaine Ohio · Member since 2016 · 373 posts · 219 votes
    4y

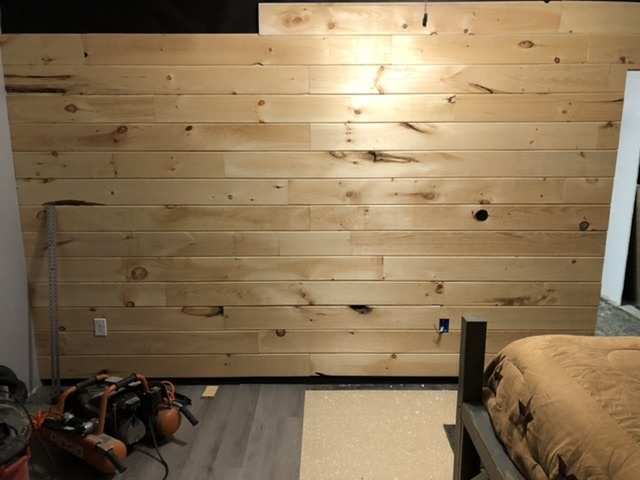
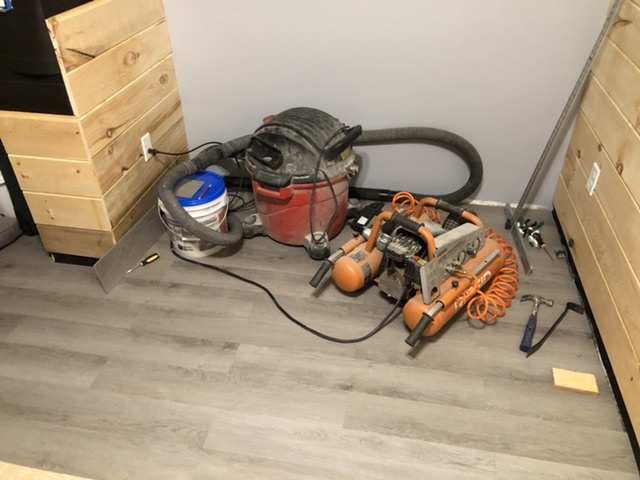
    A few things I learned with ship lap. 
    1. 1 x 8 only covers 6.5 inches.

    2. Leave a gap at the bottom, a little less than you base board (typically 3.25”), then just partly fill every 12 to 16” with your drop /scraps. No sense in putting pricy wood where it gets covered up.

    3. Same for the gap at top for trim or crown.

    4. Put something black behind to help hide pin holes and gaps. This should also help with sound and heat.

    5. Shorter pieces will fit tighter together than long ones. In other words, that 6” wide wall section next to the door will compress more than the big wall section. So the part above the door will be sloped.

    6. Electric boxes need a little more depth than drywall. A side note, at least in my area, ground wires must be green wire nutted together and one through the top to the ground screw. And all living areas need arc fault breakers.

    7. Look outside of the big box stores for better prices. Found an auction selling building supplies, i got enough 16’ stain grade pine crown molding for $0.25 ft plus 10% buyers premium to do a whole 2200 square house. Even adding the 30 mile drive that beats Lowes $1.28 badly.

    8. Put the darker parts near the bottom for a fade effect.

    Hope that helps someone.

  • Developer · Bellefontaine Ohio · Member since 2016 · 373 posts · 219 votes
    4y

    Number 1 from above, allow plus or -1/4 inch tolerance.

  • Developer · Bellefontaine Ohio · Member since 2016 · 373 posts · 219 votes
    4y

    Pieces with a bad top or bottom can be used at the top or bottom which gets cover by the baseboard or crown molding.

  • Developer · Bellefontaine Ohio · Member since 2016 · 373 posts · 219 votes
    4y

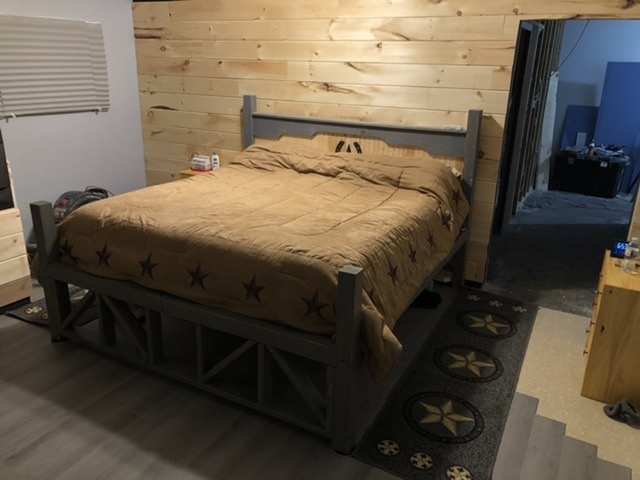
    few more days to go on this room.

  • Developer · Bellefontaine Ohio · Member since 2016 · 373 posts · 219 votes
    4y

     Hiding plumbing, wires, etc without cutting ceilings. I ran from a mechanical room to the bathrooms through a false beam. Was slab floor and blow in insulation above. Even added some lights to the bottom, the grey box near the silver support post. Yes those posts will go away later. 2 x 2’s lagged to the ceiling, attached to a box made with 1 x lumber. I have used these before for speaker wires and led lights along the edge.

  • Developer · Bellefontaine Ohio · Member since 2016 · 373 posts · 219 votes
    4y

    Support post removed, and light added

  • Developer · Bellefontaine Ohio · Member since 2016 · 373 posts · 219 votes
    4y

    We have lights 

  • Investor · Thousand Oaks, CA · Member since 2017 · 306 posts · 123 votes
    4y
    I'm exclusively using the Fannie mae Healthy Housing rewards now to remodel any affordable housing as removing lead and asbestos is a big profit center now. We can save $15k per year on financing in this way. https://multifamily.fanniemae....
  • Developer · Bellefontaine Ohio · Member since 2016 · 373 posts · 219 votes
    4y

    Thanks 

  • Rental Property Investor · Member since 2021 · 385 posts · 197 votes
    4y

    This is so helpful! Thank you so much for sharing 

  • Developer · Bellefontaine Ohio · Member since 2016 · 373 posts · 219 votes
    4y

    Glad it helps folks

  • Developer · Bellefontaine Ohio · Member since 2016 · 373 posts · 219 votes
    4y

    Shower install tips 

    1. The handle can not be in the center of the wall due to the curve in the back panel. I had to re-plumb mine.

    2. Teflon tape on npt threads will leak more often than it seals, use the dope kind.

    3. Peel off the protective film in areas that will contact each other, before assembly. If you forgot a plastic shim can be forced in, to help peal it out.

    4. Put painters tape along edge before you caulk seams.

    5. Caulk plastic parts before you assemble glass walls. It’s much easier when theres room for your feet to hang out.

    6. Put a slop on parts to allow max door size.

    7. Don’t caulk until everything is together.

  • Developer · Bellefontaine Ohio · Member since 2016 · 373 posts · 219 votes
    4y

    More shower tips 

    Don’t seal down the bottom until you make sure the door works.

    Make sure both walls are level with each other.

  • Developer · Bellefontaine Ohio · Member since 2016 · 373 posts · 219 votes
    4y
  • Developer · Bellefontaine Ohio · Member since 2016 · 373 posts · 219 votes
    4y

    When you need a door framed, but don’t want to redo the drywall, i use pocket screws from below.

  • Developer · Bellefontaine Ohio · Member since 2016 · 373 posts · 219 votes
    4y

    Breaker off small edges of drywall, try using a clamp.

  • Developer · Bellefontaine Ohio · Member since 2016 · 373 posts · 219 votes
    4y

    Break not breaker…, stupid spell check 

  • Developer · Bellefontaine Ohio · Member since 2016 · 373 posts · 219 votes
    4y

    If you have problems getting those little screw covers in, you can scrape inside the holes a bit, with a razor. I like the tighten those screws a bit first, in case the factory left them loose.

  • Developer · Bellefontaine Ohio · Member since 2016 · 373 posts · 219 votes
    4y

    Sometimes the plugs have a burr too.

  • Developer · Bellefontaine Ohio · Member since 2016 · 373 posts · 219 votes
    4y

    Clean your hammer first, or you get this.

  • Member since 2022 · 1k+ posts · 1k+ votes
    4y
    Quote from @Keaton M.:

    @Steven Westlake

    Has anyone tried skim coating over popcorn ceiling with success?

    1.Yes, I knocked it down a little first by gliding a board acoss it. Then did the mud. Took a lot of mud but it came out great. Hard Work.
    2. BEST..Put down a tarp, or old carpet, then moistened the ceiling with a garden hose. Spatuala took all popcorn off easily, in huge clumps, in just a few minutes. Unbelieveable. Then easy to sheetrock over, or mud if preferred. Fun.
Join the conversationCreate a free account to reply, vote on answers and follow this thread.