Self Storage Day to day Constructing a new facility

Self Storage Day to day Constructing a new facility

Henry ClarkPro Member
Developer · Member since 2020 · 4k+ posts · 4k+ votes

Day in the life- Constructing a New Facility location

23 June 2020, 08:39 
We are starting our 8th and final storage location. I will try to give an update as we go through construction. Although this will be instructional, you will probably also get to see the "thinking" and "concerns" about the project from my viewpoint at different stages. Things I would forget to tell you, if you said tell me about building a location.  330 unit drive up facility.

8th and final-
A. As you build each location, you have to put in so much equity up front. Could be 10%/15%/25%/40%. At some point you ask yourself how much do you want to extend yourself., We are expanding at such a fast rate, that we have not let the prior Storage location's equity buildup to support these final projects for collateralization.
B. Even though we have a very efficient system to handle multiple locations, at some point you tap the point of enough is enough., We run all of our business through one phone. Its not that bad once you are rented up, but can be a little hectic during the rent up stages.
C. Not to get into specifics but we also have other Life ambitions and other Financial alternatives we are looking at, to both diversify our assets (Teak Trees) and to enjoy different aspects of our lives.

Before Dirt Work Started-
A. Looked for a site that was "SAFER" from other competitors storage expansion. This location was under a "Planned Community" (PC) zoning, which I normally would not have known to look at. Luckily the realtor knew about the Special Condition/Use permit potential for Storage.,
B. The hilly topography doesn't lend itself to storage. There are only two more locations that are flat enough and they both have issues with them.
C. Engineering costs- We spent far more on engineering than expected. We were working around the lay of the ground for drainage and trying to fit as many units as possible to justify the project. $$$$
D. Hidden items- These were issues staring me straight in the face, but I didn't "See" them. The Fire hydrant on the property was a private hydrant for the property attached to the North, that could not be used. Originally both properties were owned by the same person. Plus the city requires all road side properties that don't have water to put in a line along all of the roadside. $$$$$$
E. Hidden items- The soft wet spot in the middle of the field was the hillside pushing water to the surface at the base of the hill. Although not a Spring, it is still too wet to build on top of. We will need to put a series of Drain Tiles underneath to take the water away. $$$$$

Day 1 of Dirt Work:
A. Contractor called the day before and said he was ready to start. Waited for him for 5 months to finish a large government project. He was both going to be available, cost was lower than other competitors and I know him professionally and personally.
B. Pulled up with 2 Scrapers and hopped the curb. This is a major Bike path and dog walking sidewalk. 3,000 vehicle per day traffic count, off major artery. So we decided on one construction entry spot. That way if we broke the sidewalk, we would have only one spot to fix and one issue with the path users. Our actual facility entry way is further east on the road. But we don't want to use it, otherwise we will bust up all of our concrete roads after we pour them.
C. Went to pull Dirt Permit and State Storm drain permit, the dirt contractor will need to do it and show them their license. About $3,000 for permit.
D. To build Office, the General Contractor who is building the pads and buildings will need to submit his license.
E. The final Building prints are not approved. I just had to give them a letter saying I would put Wainscot on the street visible side of the buildings. This was part of the agreement with the Planned Community zoning. They are also requiring Barred fence, versus chainlink fence.
F. Stopped off at the General Contractors office to start the order for 5 of the buildings. We will build these late in the fall after we can't put anymore pads in (before the ground freezes). We will put the office in, right off the bat, so the Electrician, Plummer, Security and Construction crews will have a place to stub all of the main controls and also have a warm bathroom to use.
G. These 5 buildings touch the fence line. So I want them built so we can put the fence in around the construction site for safety.
H. Stopped at the Retaining Wall group. We have two retaining walls to help with Dirt elevation. We did not want to haul any dirt off the location, so it was cheaper to build retaining walls in key spots and use the dirt there to flatten the site. Both the Retaining wall company and the dirt work company need to work hand in hand. The retaining wall company needs the dirt cleared about 8 feet back from the wall. This is so they can use Geogrid fabric as a Deadman to keep the wall from pushing out. So the Dirt company doesn't have to move the dirt twice, he needs to know to keep it back and also to clear out the dirt for 8 feet.
I. Attached are some pictures of Day 1. Should have a dry day tomorrow, then rain.
J. Using Scrapers versus Bulldozers. Bulldozers can only push dirt, Scrapers can carry it. Far more efficient to carry the dirt, if you have a lot and the distance is over 100 feet. The Grading company and I decided to bill me on an hourly rate, versus per day. Any break downs, partial rainouts or getting stuck, don't get billed to me.
K. Usually you would compact the dirt as you go. These scrapers are compacting the dirt, so we don't have a compactor running behind them. Also without getting to much into the site most of the building site will be the original dirt (compacted) and not moved dirt. Since the driveway and parking will be over where most of the dirt is being moved and we don't plan to build there until next year, it will have a chance to compact over Winter.
L. Will move in 3 inch "Clean" rock at the work entrance and out on the property as a hard surface for the construction vehicles and to clean dirt off prior to driving onto the roadway. We are required to have 75 feet of rock to clean dirt off. Keep the neighbors happy and so we don't get fined.
M. On the bottom right of the drawing, is the Storm retention pond. Give you an idea of how much land you have to give up for drainage, if required.

7Reply
282 views

Most Popular Reply

Investor · Clairemont, CA · Member since 2011 · 3k+ posts · 2k+ votes
6y
Originally posted by @Henry Clark:

Underneath this pond is a private sewer line going up to the Apartment complex on the left. Our Attorney is working up an easement to allow their line on our property. This was never recorded. The Development folks won't give us a build permit unless we get this in place.

We were originally going to tap into it, but our Engineer said to tap into the Main line. That way if any maintenance is ever needed on the Apartment line there is no dispute who has to pay. About the same distance and cost either way.

Looks like a great project! I'm currently a site/land use Civil, but the goal is to move into the small developer role and complete a lot of my own work similar to how you're managing your project. 

A thought on your sewer, you may want to see if you can put in an automatic termination clause. i.e. if they ever have to dig it up and replace it then the easement terminates and they'll have to relocate the line. Or if they fight the requirement to relocate (which they probably will) then just that if they ever choose to relocate it the easement terminates at that point. I've seen quite a few easements that are arguably abandoned and therefor could be unilaterally vacated, but lacked an abandonment clause. So we're either forced to pursue a quiet title, or attempt to get someone to agree to release their interest in the easement... 

See this reply in the discussion

91 Replies

Jump to latestLatest
  • Henry ClarkPro Member
    OP
    Developer · Member since 2020 · 4k+ posts · 4k+ votes
    5y

    Standing Seam Roofs

    Our latest location we decided to do Standing Seam roofs, versus screw down. Costs a little more, but will last longer with less leaks and need for future (15 to 25 years) checking on loose screws.

    Now I did not and am not giving a definitive answer on which is best and etc. My local distributor and prior contractor had both mentioned and recommended it, so decided to try it.

    Comparison:
    Cost wise, I don't have the difference.
    Screw down replacement, if you did have to tighten or replace screws on the Screw down system, just get larger screws so they seal better and replace.
    Erection time. Standing Seam takes extra time to place and set the hidden clamps. Every 5 feet, so not a lot of time. But you do a lot less screws overall.

    Picture below is of a normal screw down system. You will have screws all along the ridges and all across the sheet every 5 feet. These two Lips of the two different sheets show them not matching, which could lead to leakage.

    Click image for larger version

Name:	rr rf1.JPG
Views:	0
Size:	466.1 KB
ID:	199334


    Next picture shows the Standing Seam roof. The metal clip is screwed in place. This side of the sheet is clipped under the clip, then the next sheet will be laid on top and the two edges will be snapped into place. Invert your hands to each other. Then curl your fingers. Pull your curled fingers together and that is how the sheets are connected. The top sheet has glue on it, which gives an air and water tight sill to them. These also set about 3 inches above the "trough" or valley of the sheet, whereas "Screw down" method is about an inch high. Creates less chance for water or ice to come under the seams.


    Click image for larger version

Name:	rr rf 3.JPG
Views:	0
Size:	346.5 KB
ID:	199335


    Next is the clip itself from front and back. The back side shows you the screw holes attached to the trusses. This is hidden under the roof. This clip is set in the ridge where the two sheets meet and are then pushed or snapped down to each other and this clip.

    Click image for larger version

Name:	rr rf 4.JPG
Views:	0
Size:	439.3 KB
ID:	199336 Click image for larger version

Name:	rr rf 5.JPG
Views:	0
Size:	439.5 KB
ID:	199337


    Next, I'm showing you the width of the valleys on the 'Standing Seam roof". Normal Screw down roof valleys are about a foot wide and this is about 2 foot wide, using my fore arm as a gauge. Can't wait to see how this helps with snow melting or blowing off the roof, compared to the narrower screw down valleys.


    Click image for larger version

Name:	rr rf 6.JPG
Views:	0
Size:	614.9 KB
ID:	199340


    Below is an end shot of the Standing Seam roof:

    Click image for larger version

Name:	rr rf9.JPG
Views:	0
Size:	347.3 KB
ID:	199341


    Again which is better? Don't know the answer. "Standing Seam" costs more, but I don't have the figures for you. Should last longer (30 to 50 years) with less leakage problems. All my other buildings are "Screw Down" and no leakage problems thus far (1 to 6 years). I do have a "Screw Down" building we bought the location, that is around 20 years old. We are having leaks and we will have to take the screws off and replace with larger screws (so they "bite" the existing screw hole) this summer.

  • Henry ClarkPro Member
    OP
    Developer · Member since 2020 · 4k+ posts · 4k+ votes
    5y

    All of the other contractors always put the Doors on, before they put the roof on. Since the door is crammed against the roof above their heads they prefer to be able to stick through the roof and work at waist height. This crew puts the roof on first and then the doors. Did not ask if this is because its winter and they want to keep as much snow out as possible or if they prefer that way.

    Below is the side of a door. The metal arm will be attached to the wall through the open bolt holes. Once attached, they will use a level and move the bolts up or down to level the door.

    Click image for larger version

Name:	rr dr2.JPG
Views:	0
Size:	920.2 KB
ID:	199343 Click image for larger version

Name:	rr dr1.JPG
Views:	0
Size:	408.8 KB
ID:	199345


    Next step is to "Tension" the door so it rolls up or down with ease. The special rod he has will be inserted into the sprocket hole and he will crank each side until the coil or spring inside is tensioned correctly for the door to operate smoothly. Always make sure you roll each door up and down before the crew takes off.


    Click image for larger version

Name:	rr dr3.JPG
Views:	0
Size:	719.6 KB
ID:	199346
  • Henry ClarkPro Member
    OP
    Developer · Member since 2020 · 4k+ posts · 4k+ votes
    5y

    Just started doing our year end tax work. Why, I have been doing a lot of posting the last day or so, just forestalling jumping into bookkeeping and taxes. I'm a retired CPA, Controller, and CFO; but I hate doing taxes. I am not giving any tax advice.

    Luckily, I think we have gotten to critical mass, so we can start moving our bookkeeping to our CPA firm.

    One note on Taxes and this project. The majority of your 15 year or less depreciable life assets can be accelerated in year one. Depending on the project status and the potential to bill prior to year end. I will contact all of our vendors and have them catch up their billings prior to 12/31 so we can pay.

    Examples:
    Electrical
    Plumbing- road drainage
    Road contractor
    Security systems
    Signage

    Why do this?
    In Self Storage you usually will have significant cash flow later, but at start up/rent up phase, you have less cash. This reduction of Income Tax, is a cash savings in the early stages. You will have to pay more in taxes in the future since you wrote of these assets, but you will have more cash then.

  • Henry ClarkPro Member
    OP
    Developer · Member since 2020 · 4k+ posts · 4k+ votes
    5y

    ​Building framing. They are building the last building for us this phase. 30 x 220. They have nailed the Studs to the concrete and then adding the purlins between the studs. They drill a hole in the concrete first, then they drill a threaded bolt into the concrete.

    ​

    The next picture shows the side view. This building is a "Single Slope" roof to the right side. Studs on the back are taller and diminishing as they go to the front, where is the low side is. Will show you a side view, then show you the labels on the studs.

    ​

    The next labels are on the front three studs down at the base. You will notice the last three digits are 118, 318, 518. This tells the erector the sequence to place the studs. These studs are on 5 foot centers. So if this was a 20 foot wide building with a Gable or double sloped roof; you would see 118, 318, 518, 318, 118. With the 518 being in the middle.

    ​

    ​

    Will start setting up the location with signage, cameras, lights, etc. Also will start to finish out the Office and walk through that with you.

    ​​

  • Henry ClarkPro Member
    OP
    Developer · Member since 2020 · 4k+ posts · 4k+ votes
    5y

    ​ Just ordered our entrance gate yesterday. Will give you a run down on gate systems we use. We are in a blizzard so hey, got time. Over all our road ways are 25 foot wide. Use a 20 foot (drivable space) gate, the actual gate may be 30 foot long for offsetting weight and to stay on the rollers. You could go with a shorter gate. Make sure to put Posts or Bollards on each side of the gates, so no one runs into it.

    We primarily use three types of gates on our properties. Two sided swinging/hinged gates for construction entrances, Walk thru gates- in case entry gate is down, and Entry gate- we use a Cantilever gate. If in the country side, we will do galvanized. If in the city we will use Black coated.

    ​

    Before we get into the entry gate, if you look at the walk through gate you will note a "Blue" chain and lock. PEWEG grade 120, 1/2 inch "square" chain. Get at a "Rigging" store. Use this type of chain since it is impossible for Bolt Cutters to cut; and extremely hard to cut with a cutoff saw. You may see a youtube with a Vise holding it and cutting it, but they won't have a Vise outside. For a lock we use the below which is a Master Lock, model 6127A Key??????. If you keep the model and Key number, you can buy or have the locksmith key to the same Key. This is not even close to the "BEST/BEST" lock out there, but is less expensive and great. Due to the heavy neck and metal strength, no one has been able to cut through this lock with a bolt cutter. I like the moisture cover for the key hole, for our weather.

    Don't remember exactly the prices.

    Chain is about $20 per foot.

    Lock is about $25

    ​

    Above is a picture of our Cantilever gate. The next picture shows the Rollers for the gate at the bottom. There are 4 rollers, one at the top and bottom and then about 8 feet away is another set of top and bottom rollers. The gate rides on these rollers, and is called a Cantilever since the weight transferring over the rollers as you close and open, the weight on one side, helps offset the weight on the other.

    ​

    Good thing about this gate, is it can be turned off and then easily manually rolled open or shut.

    a. Your gate might not being getting electricity. Breaker switch could be thrown- long term you need your electrician to check if that is happening. Make sure your Electrician when installing puts the gate on its own Breaker Switch. Same thing with your NVR and Computers.

    b. First thing to check though if gates won't open are the sensors. See next section.

    First picture. To access these controls, you must unlock the cover. Then second picture, turn the switch off.

    Third picture is the manual latch lever.

    Fourth picture. You must use two hands and at the same time, pull back on the Handle sticking up in the air, and lift the latch that is laying down on the locking arm, to the second tooth position. Then just roll the gate open or closed.

    Some folks may use "Lift" gates where there is just one fulcrum point. Then the whole gate lifts up in the air, until it is at a 90 degree angle to the ground. My contractor has this gate at his storage. He says the only issue he has ever had is in an ICE storm and the gate was to heavy. He has to go knock off the ice from the gate.

    Ice is an issue with the Cantilever gates also. On the top bar, we take a small hammer and knock the ice off. Otherwise it builds up under the roller wheel and blocks the gate as you open. On the bottom bar and Rollers, I usually take windshield wiper fluid and pour on the two bottom rollers and bar.

    ​

    ​

    ​

    ​

    First thing to check if your gate won't open are the sensors. See if weeds have grown up or trash is near the Beam or reflector. Or if humidity or frost are occurring.

    a. Make sure you have hoods on both your Beam and reflectors to protect them from ice and rain.

    b. Put Rain X on them to keep them clean of ice, snow or humidity.

    c. You will have two sets of Beams and reflectors. One for the gate opening and one for the rear area where the gate retracts when opening. These sensors should note if there is a vehicle or a human blocking the signal and stop.

    d. Also you may have in ground sensors on both sides of the gate where the vehicles drive through. The sensors, sense a vehicle and will stop the gate from closing until the gate moves. See the third picture below. After the driveway is poured, the Gate company will cut tracks in the concrete and lay a sensor wire there and cover up.

    e. Some gates may use a Bumper sensor on the edge of the gate and if it hits something it will retract or stop.

    ​

    ​

    ​

    All and none of the above may be required depending on your government/zoning entity, your business model or other considerations. Also the above are what I use, not necessarily all or the best solutions on the market.

    These automated gates can be programmed in several fashions.

    a. Keypad, we use just a push button. You could use a code or a fob. We don't want the extra calls on I lost my code or fob. To beef up the security just using a push button, we have about $8,000 worth of special cameras. Face camera when you push the button coming in and going out. Special license plate camera that is built just for that. Passenger camera and an overall camera. Both sides of the gate.

    b. You can program the time the gate stays open when activated.

    c. We have programmed only during the hours 8 am to 9 pm.

    d. We have a hard lockdown we communicate at 9pm.

    e. Gate is accessible through our phone. We are 25 minutes away. So if someone gets locked in after 9 we can open, or if we want to test because of frost, we can do this over the phone. Or if police need to get in after hours.

    ​

  • Henry ClarkPro Member
    OP
    Developer · Member since 2020 · 4k+ posts · 4k+ votes
    5y


    Kicking back listening to all the Beatles Songs, while I am having dinner at the office and paying bills.   "Little Darling, feel like that snow is melting"  "Here comes the Sun, it's alright".

    Today made me think back to Xmas many many years ago.  Could barely go to sleep the night before.  Was that long present, my first BB gun?

    The Erection crew has the final 30 x 220 building done.  Just need to tension the doors and clean up the job site.  Great team (one week 25 highs and 9 lows, luckily no wind).  All buildings are completed except for the Office, which will take a while for us to finish the inside.  Tomorrow the buildings will get turned over to us.  We have already had several rains and snow melts.  All the roofs are leak tight.  Used a Standing Seam roof for the first time.  

    If you look back over the post, you can see all of the steps needed, potential missteps, etc.  The biggest test is "Will they Come?".  See my post on that topic.  

    As our Basketball coach would say, pat yourself on the back for a day, then get back to practice.

    We are about half way there with this location and project.  Still need to build more in the Spring, but all of the tasks are laid out.  Will start setting up the signage, gates/fences, internet, Sparefoot, Security, etc.  Then the race to 65% occupancy (breakeven).

  • Henry ClarkPro Member
    OP
    Developer · Member since 2020 · 4k+ posts · 4k+ votes
    5y

    Material came in, to do the Siding. This property is zoned PC or Planned Community. In Industrial zoning you can do whatever you want. In PC, you have to get approval for everything. In our instance, for any building side facing the street we had to have a Siding on the bottom skirt or wainscot. Some of our buildings where we could, we put end units so we didn't have to do the Siding. The fence we will need to do ornamental bar rails versus chain link.

    We picked a plastic molded product to keep the price down. They would not allow us to do a different color metal for the wainscot. This application will cost about $20,000 more than just sheet metal. If we had gone with the false stone or brick face, it would have cost around $40,000; which we had already run into cost over runs on some other areas, so I took the least expensive route.

    Basically it takes a few more metal ribs, we screwed treated Plywood on, so it wouldn't rot, then you fit and screw down the molding. All of our buildings are now buttoned up. Just need to finish out the Office.

    Click image for larger version

Name:	cb rr side1.JPG
Views:	0
Size:	2.27 MB
ID:	199646 Click image for larger version

Name:	cb rr side2.JPG
Views:	0
Size:	2.19 MB
ID:	199647 Click image for larger version

Name:	cb rr side3.JPG
Views:	0
Size:	1.85 MB
ID:	199648 Click image for larger version

Name:	cb rr side4.JPG
Views:	0
Size:	2.09 MB
ID:	199649
  • Henry ClarkPro Member
    OP
    Developer · Member since 2020 · 4k+ posts · 4k+ votes
    5y

    Things starting to move again on project. We are doing the inside of the office, which like a house requires different Trades at different times. Thus this part of the project is a lot of waiting for one Trade to get done, so the next can come in.

    Spray Foam Insulation:

    We decided to insulate the interior walls for both sound and climate. Went with an Open Cell versus a Closed Cell spray foam. This actually is what slowed progress down. We had to wait for a day that was over 40 degrees. The Truck with the equipment sits outside and the foam won't flow right if near freezing. Decided to do Spray foam since not only does it insulate by the material, but it provides a near 100% air barrier versus Insulation rolls.

    Won't get to much into Open versus Closed. We picked Open because it has better Noise insulation. Generally Closed is better, for temperature control, rodent control, Building Structural support, but is more expensive. Ours was applied 3.5 to 4 inches thick. This was a 20 x 30 building. We used the normal manufacturer insulation for the roof. This had 10 foot walls, outside walls and interior walls. Total of 1,500 sq feet. Total applied cost of $2,755.

    Provides a nice fit and your not cutting rolled insulation to size. Took about 2 hours to do the whole building.
    Second photo shows the spray foam overlapping the roof insulation. If you look at the red or dark metal strip along the edge of the ceiling bottom, this is where we will attach the ceiling. Thus there will be an additional air barrier in the "Attic" for insulation.

    Below we use a very small Air conditioner unit and 3 small wall heater units. At our existing location, which is built and insulated in a mirror image, 100 degree days and minus 10 degrees we are very comfortable due to the spray foam insulation. Spray foam may cost more, but we only have about $500 into Heating/Cooling units, which are easily replaced.

  • Henry ClarkPro Member
    OP
    Developer · Member since 2020 · 4k+ posts · 4k+ votes
    5y

    Getting closer to opening on this project, what I will call Phase 1. Two most exciting times for storage development:
    1. Pictures below, putting on the Unit and size numbers. Means we are getting close to opening up and starting to rent.
    2. When we hit 65% occupancy, which means we are covering Principal/Interest and all costs for Phase 1.

    The unit numbers are 2 inch widths. Key to applying is to wipe the surface clean and dry. Air temperature must be 60 degrees or higher. Peel the back cover off, then apply. Scrape along the back several times all over to affix to the metal, then peel off the exterior paper cover. If it is the first time you use these, try with another number other than "1" to get the hang of it.

    Unit Size number "10" below. We put this next to the door latch. We do self service, so customers can look for the size 10/15/20 without us telling them a specific unit number, since all of the doors are the same size and you can't tell the depth without opening up. This also helps us, since we are not sitting at a computer all of the time, and can't give them specific unit numbers and sizes off the cuff. Buy extra in case you mess up. You have to buy a minimum quantity and don't want to have to order one number.

    Was afraid these numbers would fade or peel, but they have done really well over 7 years. The only time we have had problems is if it was too cold, or we did not get all of the moisture off the surface.

    You might note the orange or red tape to the left in the first picture. We will put red tape up for "light" locations and green tape for cameras. This way our electricians and security camera guys know where to put them, without us being there all of the time.

  • Henry ClarkPro Member
    OP
    Developer · Member since 2020 · 4k+ posts · 4k+ votes
    5y

    Interesting fact. Below is a Cacao or Cocoa bean. The white internal portion is a covering over the actual bean. You can actually eat of suck the white meat off of the bean. It is super sweet. Other than money, always remember why your doing storage. We are enjoying investing in Belize.  Just got back from checking things.  First trip since last February and Covid.

  • Henry ClarkPro Member
    OP
    Developer · Member since 2020 · 4k+ posts · 4k+ votes
    5y

    Can you say slow going?
    Great weather, but contractors are really tied up and hard to get to close small issues.

    Uh Oh. My wife just looked over my shoulder and got on to me for posting her beautiful picture.

    Assorted lose ends:
    a. Will go for Occupancy and inspection next week. Was waiting on Plumber which is done., Fence/gate not responsive. Big Google project going on. Road contractor build form for parking and will pour next week. Parking is in the form. Need to put Handicap parking and regular parking for occupancy. Still have the handicap form from last project. Costs about $50. The dirt section in front will be where our Road sign goes. Still need to design.


    b. Overview of phase 1, basically the buildings you see above. Phase 2 will be the two long buildings at the top of the picture below. Just need to pour the roads around them.


    c. Phase 3, we will start doing pads on the bare ground above next week. Building cost went up about 25% since the units we build last year.


    d. The storm retention pond drain is shown below. The drain is the large Concrete structure. Water can exit in both the round circle at the bottom and the small outlets at the top. Facing the side of the pond is the outlet which goes to the city storm drain. This pond has to be designed and sized by an engineer. They only count dry surface area as retention. If this pond had standing water, they would not count that area. The black tube on the left is the driveway drain. It is taking all of the water flowing from the buildings in "b" above for phase 1, into the pond.


    e. Landscaping is almost done. Really dry here. Put seed, then grass mat down. Watering every night. My son and his friends will get home from College. Have them mulch all trees and bushes then. Also in the second picture, time to take the Silt fence out. Grass has mostly grown. Reseeding some. Have to get a zero turn mower to mow since this is a high bank and my riding lawn mowers wont work. The first picture where the two Bollards are in the concrete is where the security gate will go. You can also see a light green standing plastic stand. This is one of the connections where the Fiberoptics goes into the building. They just put in yesterday. Same security system as at our other location. Will go over later. Cameras are already recording in Phase 1.


    f. City Inspection, will schedule next week. Kind of crazy, they have all of the inspectors come out at once. I will probably be the only one there. Contractors don't usually show. We will get a bullet list of items that need adjusted. Then we fix and just email a picture to them for approval. Just remembered on the bathroom sink, it has a plywood backing against the wall. It has to be painted, or the city won't accept. I noticed and painted today. Must be a plumber thing, that they don't paint wood. This was an exception at our last location inspection.

  • Investor · Wellesley, MA · Member since 2017 · 85 posts · 15 votes
    5y

    @Henry Clark

    Really nice notes. Do you think a project like this is doable out of state?

  • Henry ClarkPro Member
    OP
    Developer · Member since 2020 · 4k+ posts · 4k+ votes
    5y

    You would need to hire a general contractor.  Then hire a manager to start up.  

    With all of the detail and issues that can come up, I personally would prefer to develop myself. But that would mean covering the project for over a year. 

    Since your open to out of state. I personally would rather purchase a location versus develop out of state.  You will miss out in the inherent profit from the development but also the risk and time. 

    Also purchasing takes less time allowing you to expand faster. 

    Find some of the towns that don’t have any of the Reits or large regional firms. Then you have 2 or 3 value add propositions. 

  • Henry ClarkPro Member
    OP
    Developer · Member since 2020 · 4k+ posts · 4k+ votes
    5y

    Although I hear of out of state investing. We have all we can handle in a 40 mile circle. We could keep investing for the next 10 years and still never be done. I would go after the value add multiples you get when you operate in an area versus several states. 

  • Henry ClarkPro Member
    OP
    Developer · Member since 2020 · 4k+ posts · 4k+ votes
    5y

    Parking pad poured today. Will need to dry for 7 days before we can use. Will paint handicap parking, put up handicap parking sign and penalty sign, then paint handicap path. The second picture below they are putting in the curb. This was part of the engineered drawing. Elsewhere I will try to get away with no curb, unless to catch water. Want to be able to push snow over the curb without hitting it.


    Now that the parking spot is poured, we can put the road sign behind the two gentleman in the picture above. Stopped by my sign company and discussed what I was looking for. 4x8 double faced sign. He will erect with the bottom 4 feet off the ground. I will surround with landscaping blocks and fill in. The picture below is similar, but is using native stone blocks. Road signs are under a separate permitting process versus for the project itself, so a separate permit is required.
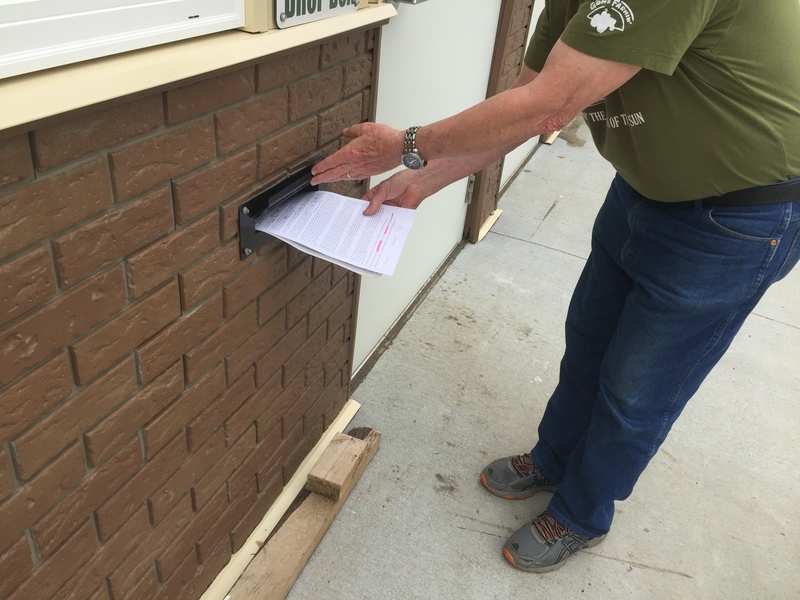


    Called in to city permitting to get inspection. We are not totally done, but want to get the ball rolling. Still need to paint and put handicap signs, which I will do as soon as concrete dries. Also the Fence and Gate are not in. Stopped by the fence company. Our gate is third on the to do list in the shop, so should get done this week. The fence material is being rationed out, since they are short. But we have been on their list since last November, so we will get ours.

    Shortages of material and price hikes. I have asked a Pool person in Phoenix and there is no Chlorine available for pools, Herbicide applicator for corn/soybeans who is almost out and it is just the start of the season, and Fence distributor. Plants are running, but the shortfall is due to fewer truckers. Back in 2017 E logs became Federally mandated for commercial truckers. A lot of the older truckers have decided to get out of the business.

  • Real Estate Consultant · Denver, CO · Member since 2021 · 666 posts · 389 votes
    5y

    @Henry Clark Great step-by-step post. You have made a lot of progress given the difficulty of getting building materials right now. Congratulations! 

  • Henry ClarkPro Member
    OP
    Developer · Member since 2020 · 4k+ posts · 4k+ votes
    5y

    Well its Monday and got sign off on the last inspection items for Phase 1 of our new facility. We won't have the security fence and gate in, they are supposed to be in over the next 2 weeks. But security cameras are functioning.

    My son and I put our sign up. Always wait till ready to open. Our first location I put it up before we were open and had to deal with phone calls for 3 months, that we couldn't help.

    The handicap and parking lines, waited till my son got back from College. Couldn't bear to think getting down on concrete to put the masking tape down and do the painting.

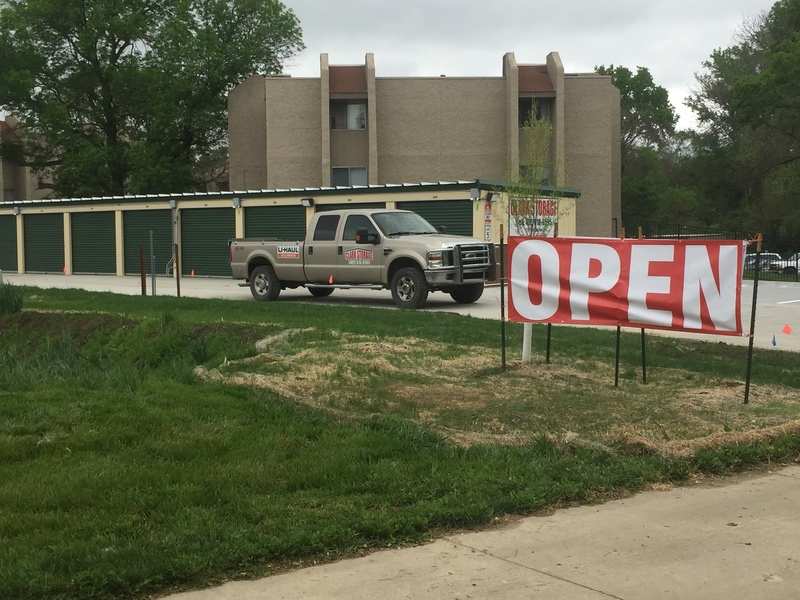
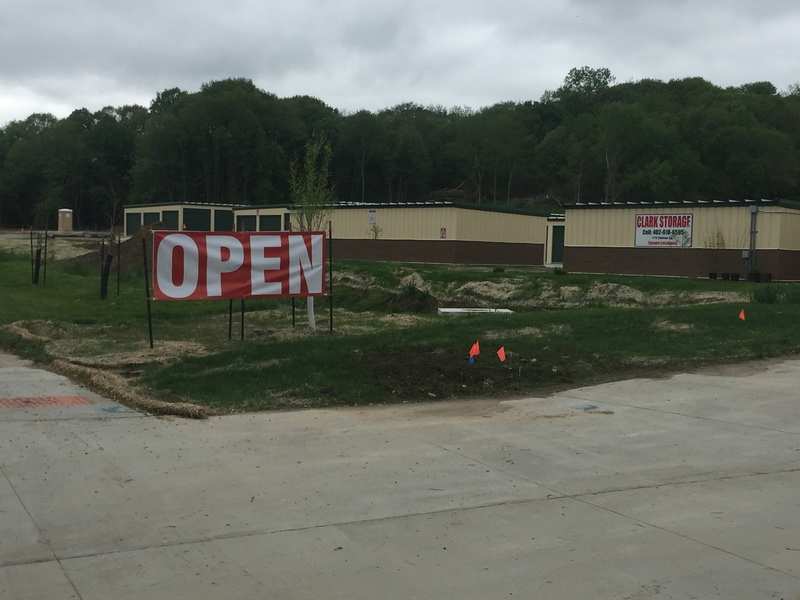
    Tomorrow will put up to "OPEN" signs up along the road. Tonight turning on our Sparefoot new location listing. More calls, but hey, that's great.


    Putting down the concrete sealer in the office. This will help to keep it cleaner and less stains. Waited till all of the inspectors were done. Will let it dry tonight and start moving in office equipment.


    Yahoo.

    Tomorrow is day 1 of renting.

  • Henry ClarkPro Member
    OP
    Developer · Member since 2020 · 4k+ posts · 4k+ votes
    5y

    Well guess what.  While I was putting up our "OPEN" signs out front we got our first customer.  Paid a full year for the next size lower price. About 329 more units to go.

    Marketing:

    Got our wall signs up. 

    "OPEN" signs up. 

    Sparefoot turned on.

    Have one Bus Stop Bench advertisement.  Will try to get more in that area.

    To do:

    Need to install our road side Monument sign this week.

    Need to get our Google business listing and map location set up.  To do this we have to set up a mailbox at this location.  They will send a postcard to confirm the location.

    For now, will see how our 5,000 Vehicles per day, I believe and the OPEN signs do.

    Go to Sparefoot and type in zip code 51503 and then switch ranking to based on Distance.  We are at the top.  Sparefoot measures from the post office.  So we beat our closest competitor by our 2.2 and their 2.8 miles distance.  Will have to start working on getting to the top ranking by Price, Reviews and Recommendation over the next 12 months.

  • Henry ClarkPro Member
    OP
    Developer · Member since 2020 · 4k+ posts · 4k+ votes
    5y

    Things are continuing to get knocked out. As mentioned before I have stayed with my "Local" contractors who have build all of my prior locations. These last two projects are a lot larger than my normal one building at a time, thus they have not been able to stay on the project, due to other customers.

    Getting ready to put "monument" road sign in. Basically Clarkstoragellc with our phone number. Will be a 4x8 sign on both sides. My son and his friends will then build a rectangular retaining wall around the sign posts. Three foot high, and 4 by 9 feet rectangle. The two posts will be where the two orange stakes are. Then the wall around it. Then a Lily bed. Did a favor for my neighbor who has a Lily garden. Get to go get $300 of lily plants and will use for landscaping.


    The fence and gate people are working. The black ornamental fence is up front at the entrance. Along the top of the hill in the second picture is the chainlink fence. This fence was supposed to be put in, last December. They are way behind.


    The Building pad folks just put in another 40 wide pad this morning by 11am. We alternated 30 then 40. They decided to build all of the 40 pads first so the concrete trucks can pour from each side. This keeps them from manually having to move as much concrete.


    Road guys are also pouring today. They will be completing the Circle around the lower units. Once this dries for 7 days, the people can make a circle versus having to backup.

  • Henry ClarkPro Member
    OP
    Developer · Member since 2020 · 4k+ posts · 4k+ votes
    5y

    Systems recap:

    1. Sparefoot advertising- turned on. Working on getting the best ratings for distance, references, price, and recommended. Won't put a lot of effort into this, will focus on the build out still. Ranked 3rd out of 107 already for this zip code on the Recommended rating, thus we show on the first page of a search.
    2. Webselfstorage- set up and turned on this operating software.
    3. Insurance- use Ponderosa insurance for operations. Still have our construction insurance in play, since we are still building.
    4. Gate system- not installed yet. Will use local PC based operating system. Been having to really put the bite on my vendor. Should have been in place months ago.
    5. Camera system- For phase 1 they are installed and turned on. We have 16 cameras covering Phase 1 of about 40 units including the entrance and office. We run a ratio of 1 camera to 6 units in the regular storage area. Still have to set up offsite PC or phone camera access.
    6. Alarm system- Have door entry phone notification. Also have our intruder alarm turned on, if the keypad is not activated.
    7. Google- still need to set up a new location, so we show up on the Google map for self storage.
    8. SEO- search engine optimization. Our SEO is working on this new site to increase the Google recognition.

  • Member since 2020 · 30 posts · 9 votes
    5y

    Hi Henry,

    Very fun reading through all of this. I'm originally from Iowa so its fun to see someone doing commercial work there. My wife's parents also just finished a 200 unit construction build in Grand Junction, Colorado. I've been doing the marketing for them and we are at 70% occupancy after year 1. I want to leverage their equity to expand, but they put their blood sweat and tears into the build and they don't want to do anymore.

  • Henry ClarkPro Member
    OP
    Developer · Member since 2020 · 4k+ posts · 4k+ votes
    5y

    @Tyler Hallman

    Congrats they are into positive cash flow. If this happened in 12 months then you have even greater demand. 

    Start culling your bad customers.  At 90% by size start raising the rate for that size for new customers

    Family businesses are tough.  Different objectives and views on life. 

    Recommend you don’t do the following, but if your seeing the value of expanding.  Let them know what you are doing.

    1.  Get an appraisal done. If it cost them $1.5 and they are 70% full it will probably appraise for around $2.4mm 

    2.  Decide how you want to finance the next project   Assuming you can’t expand at the current site   Recommend you do SBA   Talk with a banker and your in laws   See if they/you can use the existing location for collateral.   Let’s say you do another $2mm location  SBA will need $200k investment from you.  Either on your own or a loan against your in laws equity come up with the $200k  

    Recommend you do through their banker   A different bank won’t want to take a second lien position against there property  

    Tell them congrats.  

  • Henry ClarkPro Member
    OP
    Developer · Member since 2020 · 4k+ posts · 4k+ votes
    5y

    Been moving ahead. Last two pad sites need to be poured. One is framed and will be ready next Wednesday. Then they will start the last pad. Road crew will come back and start paving around the pads.

    For the city we broke this site into 3 Inspection or occupancy phases. Phase 1 is at 45% occupancy on 45 units. These are the small buildings at entrance. Phase 2 will have about 88 units, which are the two long buildings in the middle. Just need to finish electric next week and get inspection. Phase 3 which are the pad sites will have around 200 units. These pads should get finished in about 1 1/2 weeks. Then roads and run conduit under ground. Buildings are supposed to come in late August and start erecting Phase 3. Fence folks came out after they pulled off for 3 weeks and I told Sales person to set a meeting at their office so I could come yell in their faces in 2 hours. Original install was for December. Got a call 15 minutes later, saying team was coming out the next morning.


    Continuing to work on sign. These blocks need to be cut down since they are supposed to be "staggered", but come in a perfect square. Thus the guys are measuring and cutting down. Told them $1,000 they can split versus per hour, to build sign base. Amazing how things get knocked out. Saves me cost and waiting on contractors.


    To get Phase 2 inspected, we need to put up fire extinguishers. Had Fire marshal come out and pick locations for access and distance. Have about 15 of these to install. Just had our annual inspection at our other location for those extinguishers. Our security systems person also does extinguishers.

  • Henry ClarkPro Member
    OP
    Developer · Member since 2020 · 4k+ posts · 4k+ votes
    5y

    Just back from Belize. Some times you have to remember why your pushing and what Storage can do for you. Maracas in Orange Walk on the river. Its lobster season. These dishes are lobster. Ceviche, rolls, tacos and quesadillas. Actually didn't sell whole lobster.

    ​

    Teak seedlings from last year are doing great. About 5 feet tall. Same as the replacement ones in the pickup, the original planting was I believe around October of last year. By December the old trees should be about 15 feet tall, from their current 5 feet. Had a historic flood last year due to two back to back hurricanes and killed about 2/3 of the seedlings, thus replacing.

  • Specialist · Boston, MA · Member since 2020 · 125 posts · 40 votes
    5y

    Teaser: "The website with slow loading is in the Google red zone."

    @Henry Clark wrote: "SEO- search engine optimization. Our SEO is working on this new site to increase the Google recognition."

    Google has already recognized your website and placed it in the red SEO zone of websites. Such websites are shown on the last pages of search results. Google PageSpeed test shows the loading results of your website:

    Henry, ask your webmaster to speed up the website load time to 3 seconds. Your website will be able to retain 90% of visitors while it loads. The number of website customers will increase by 3 times. Google will place it in the green zone. Your SEO specialist will keep up the work.

Join the conversationCreate a free account to reply, vote on answers and follow this thread.