Quarantine // cabinet painting??

Quarantine // cabinet painting??

Investor · Seattle, WA · Member since 2015 · 55 posts · 33 votes

Hi BP!

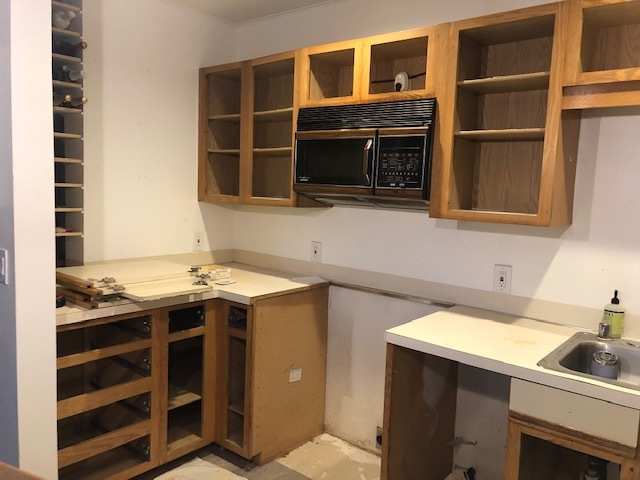
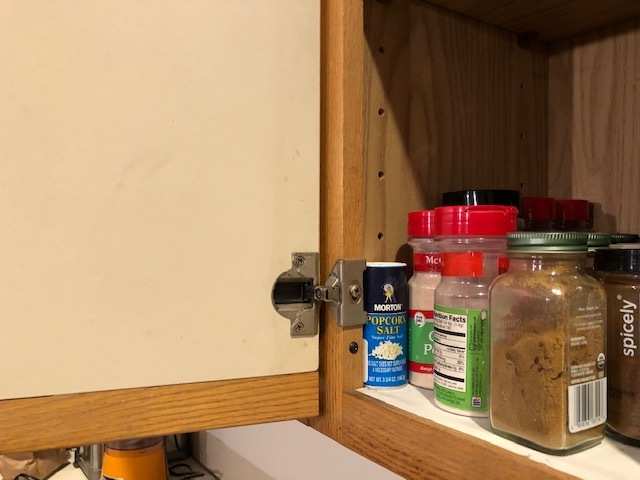
I just finished redoing all the flooring in my house, as I am quarantined and bored out of my mind. I’m thinking I should just paint the cabinets too. I can’t afford new ones so painting is the next best solution. I’ll post some pics as they are a weird material. Any advice on how to prep or what colors / paint types would be much appreciated :)

Thanks!

1Reply
89 views

Most Popular Reply

Member since 2018 · 9 posts · 23 votes
6y

Step 1-clean thorough. remove any grease/grime.

Step 2: sand, to scuff up the surface

Step 3: remove all sanding dust

Step 4: use a bonding primer that works on glossy surfaces. Valspar (at Lowes) makes a great one.

I paint cabinets like this all the time so if you follow the steps you should be good to go.

See this reply in the discussion

32 Replies

Jump to latestLatest
  • Investor · Seattle, WA · Member since 2015 · 55 posts · 33 votes
    6y
  • Member since 2018 · 9 posts · 23 votes
    6y

    Step 1-clean thorough. remove any grease/grime.

    Step 2: sand, to scuff up the surface

    Step 3: remove all sanding dust

    Step 4: use a bonding primer that works on glossy surfaces. Valspar (at Lowes) makes a great one.

    I paint cabinets like this all the time so if you follow the steps you should be good to go.

  • Rental Property Investor · Fayetteville, NC · Member since 2014 · 884 posts · 670 votes
    6y
    Originally posted by @Kristen Buckley:

    Step 1-clean thorough. remove any grease/grime.

    Step 2: sand, to scuff up the surface

    Step 3: remove all sanding dust

    Step 4: use a bonding primer that works on glossy surfaces. Valspar (at Lowes) makes a great one.

    I paint cabinets like this all the time so if you follow the steps you should be good to go.

    Exactly! Only thing I would add is to use a high quality cabinet paint. Cheaping out on paint can cause you real problems down the road. 

  • Theresa HarrisPro Member
    Member since 2019 · 15k+ posts · 11k+ votes
    6y

    Both Kristen and Justin gave good advice. You might want to add hardware as well. Post photos of the progress.

  • Member since 2018 · 9 posts · 23 votes
    6y

    I agree with both of those.  Sherwin Williams Pro Classic and Benjamin Moore Advance are the 2 readily available high quality cabinet paints.  Not cheap, but you don't want cheap paint if you're going to go to all this trouble.  Adding handles will keep you from having to touch the cabinets all the time.  The less you touch them, the longer the finish will last.

    Here's a link to someone that painted the same type of cabinets, and added hardware, so you can visualize how it will look. The only thing I'd caution is don't be tempted to put a clear topcoat on top of the cabinet paint.  1. it's not necessary because the paint will harden/cure, and 2. it will yellow over time.

    https://www.thehandymansdaughter.com/tips-for-updating-80s-kitchen-cabinets/

  • Investor · Seattle, WA · Member since 2015 · 55 posts · 33 votes
    6y

    Wow that actually looks acceptable!  I had no idea these could get such a nice refresh..ok I'm going to go for it.  Standby for photos and updates!

  • Springfield/Eugene OR · Member since 2019 · 17 posts · 12 votes
    6y

    I recently repainted my kitchen cabinets and have both worked for a painting company and at a paint store. A few recommendations to add to this thread: 

    - Oil based primer goes on far better than water based primer and covers the previous paint and bare wood more effectively (just make sure to use a separate brush from your water base one and clean it out with paint thinner) 

    - You can apply a water based paint upon oil based primer once it dries without a problem. For kitchen cabinets I recommend using a semi-gloss paint, it handles water and constant cleaning far better than flat, eggshell, etc.

  • New to Real Estate · Denver, CO · Member since 2020 · 21 posts · 9 votes
    6y

    @Adam Sharp Hope you post lots of after pics! Can’t wait to see :)

  • Member since 2019 · 1k+ posts · 1k+ votes
    6y

    @Adam Sharp

    Benjamin Moore “cabinet coat” is pretty dang awesome. Durable as heck too. I’ve moved to that for all doors and trim even.

    Paintlifetv has a great series on cab painting on YouTube. If you have a decent air compressor grab a hvlp and spray away.

    Clean w dawn, rinse, wipe, scuff, prime, 2x coat. Mark the doors. I recommend hanging to spray and dry, drill couple small holes on the non-eyesight side and grab wood hangers that will swivel. Use cup hooks to hang from hanger. Set up a broom stick across some saw horses or similar. One broom stick to hang dry, one in your spray booth. Bingo, Bob’s your uncle new looking kitchen.

  • Real Estate Investor · Williamson County, TX · Member since 2011 · 1k+ posts · 961 votes
    6y

    @Adam Sharp Your cabinets have a plastic melamine coating that repels dirt and...paint. So for sure use a bonding primer. Use a small diameter foam roller and foam brushes with oil based primer per the earlier post by a pro (I agree, zinser and Benjamin Moore make good ones)and throw the roller out afterwards. So Easy cleanup even though oil based. Well worth it. The bm advance paint (requires primer) is a hybrid oil/acrylic paint that levels out beautifully and dries very hard. Recoat only after 48 hours...so delays job a tad. But worth it. I used it on my doors/trim with mini microfiber Wooster roller and touched up any drips with foam brush. You need a regular sash brush, too for applying. Foam for drips.

  • Real Estate Investor · Williamson County, TX · Member since 2011 · 1k+ posts · 961 votes
    6y

    @Marian Smith ps. Might want to drill a hole for knobs on one door to see how the plastic drills. Should be fine but if it is difficult might want to drill holes before painting at least final coat. Tip: drill counterclockwise a turn to create an indention then forward. So your bit doesn’t slip on the plastic.

  • Member since 2020 · 2 posts · 1 vote
    6y

    Hi Adam, great choice on floor color by the way. I would definitely refer to YouTube about sanding the doors down correctly which is probably the most crucial step. Also, I am in the kitchen cabinet business and we have used this product from Home Depot: Rustoleum Cabinet transformation kit. I also ship new, affordable (ready to assemble) cabinetry nationwide...if you're interested in a free estimate please let me know. 

  • Investor · Seattle, WA · Member since 2015 · 55 posts · 33 votes
    6y

    @Kris H. - could you recommend a spray gun? I’ve got a small 1hp 8gal. compressor if that helps w a recommendation.

    I was looking at this one:

    https://www.wagnerspraytech.com/products/paint-sprayers/flexio-5000-paint-sprayer/?utm_source=Google&utm_medium=ps&utm_campaign=DR_FLEXiO&utm_content=%2Bflexio%20%2B5000

    But am usually hesitant on these types of products as they’re normally somewhat crappy.

    I’d like a semi professional model that will hold up and procure good results. Spraying paint out of the can would be ideal if possible.

  • Investor · Seattle, WA · Member since 2015 · 55 posts · 33 votes
    6y

    Does anyone know how to take these dang drawers out? I can’t figure these out for the life of me.

    Any tips / tricks / techniques??

    Thanks :)

  • Member since 2019 · 1k+ posts · 1k+ votes
    6y

    @Adam Sharp

    I use this one (don’t think you have PA down south though)

    https://www.princessauto.com/en/detail/2-3-mm-hvlp-gravity-feed-paint-spray-gun/A-p8528523e;jsessionid=AZwJYRn8QUNQro43udVtW2b9.pal-prod-com3

    Wide variety of gun quality and not all expensive ones are great, same as not all cheap ones are crappy (but usually cheap ones are). You can absolutely get good results with a small electric however, double stub your paint for sure. I cannot stress this enough. ALL paint need straining even the SW that I buy comes with chunks big enough to cause spits and splatters through a sprayer.

    A 8gal compressor should be plenty and you’re only painting 1 door at a time. Practice with your particular paint so you get regulator pressure set perfect

  • Investor · Seattle, WA · Member since 2015 · 55 posts · 33 votes
    6y

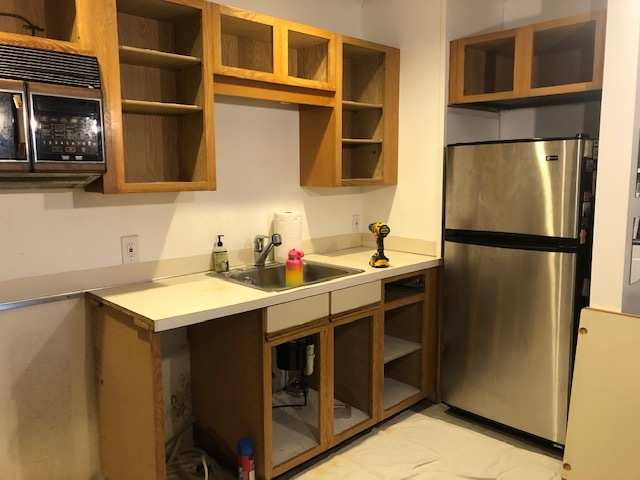
    Ok breakdown and demo complete :) degrease and sanding next!
  • Investor · Seattle, WA · Member since 2015 · 55 posts · 33 votes
    6y

    QQ for everyone - any recomendations on cheap countertops?  For 25 sq. ft. and I really looking at $1,000?  What are my options, and can anyone break out the install cost?  The numbers I'm seeing seem redonkulous.

    Any advice on how to reduce cost and potential alternatives would be greatly appreciated!

    Thanks!

  • Investor · Seattle, WA · Member since 2015 · 55 posts · 33 votes
    6y

    One more newb question - Im banging through my cabinet doors with an orbital sander and 80grit sand paper.  Does the speed at which the orbital moves degrade the purpose of this step (pitting and grooving the surface for the paint to adhere to? Or am I good to go with this technique?

  • Member since 2019 · 1k+ posts · 1k+ votes
    6y

    @Adam Sharp

    That’s pretty aggressive, I use a drywall sanding block at 220 and elbow grease. Once they’re clean you really only need a light scuff to promote adhesion of primer.

  • Rental Property Investor · Phoenix, AZ and Rehoboth Beach DE · Member since 2019 · 1k+ posts · 1k+ votes
    6y

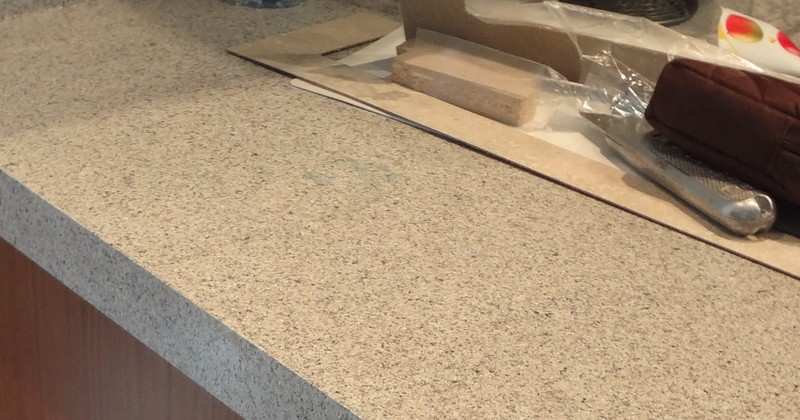
    Re the countertop, I had a company spray epoxy coatings on our rental house countertops and 3 bathroom vanities.  The company sprayed right over top of the old formica in the kitchen, and cultured marble in the baths. The formica seams get filled in and sprayed over, so you won't see them anymore.  We didn't need to remove the faucet or drain, they were masked and sprayed around in place.
    All of them still look like new after 8 years.  You don't want to use abrasives like Comet or Soft Scrub on them.  Just 409, Fantastik or similar cleaners.  He charged us $400 to do them all back then. 

      The vanities have a light gray/brown speckled finish.   
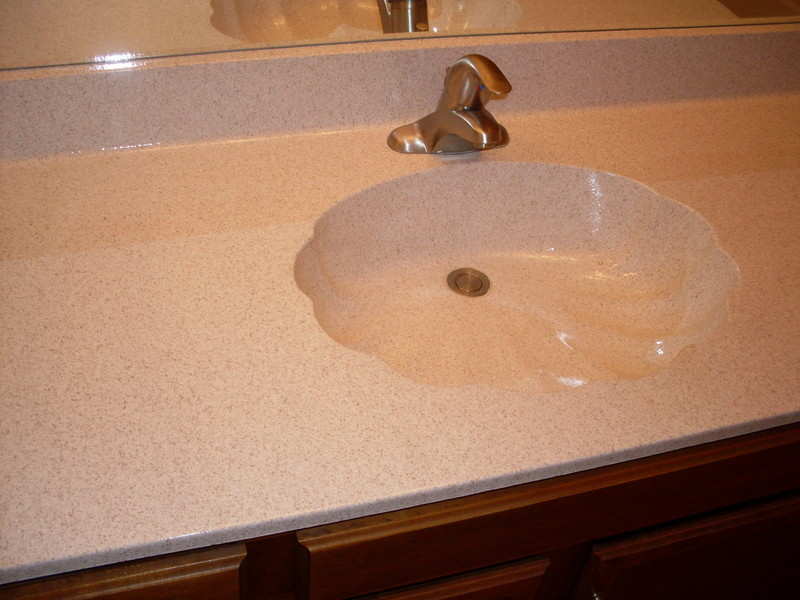
    The kitchen is a bolder gray speckle.  
  • Investor · Seattle, WA · Member since 2015 · 55 posts · 33 votes
    6y

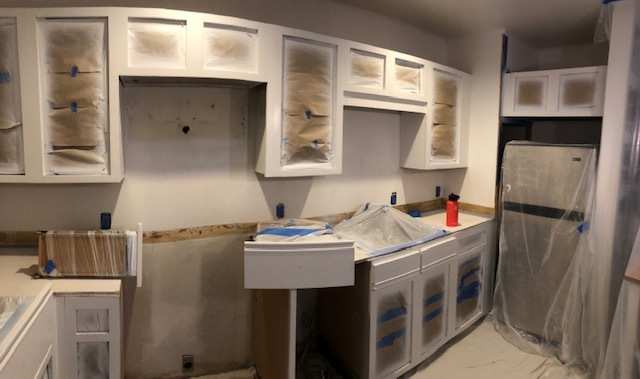
    OK team - quick update for everyone.  I went the HVLP gravity spray gun route.  Bonding primer does not spray well.  I thinned it with Floetrol and water and had some luck but probably would do it again.

    Just layed down the first few coats of BenMoore Advanced, took 1gal semi-gloss, +16oz Floetrol, +8oz water.  Sprayed great through my 2mm spray gun and covered well.  I have a 1hp 8gal compressor that is definitely undersized for the job but with some patience and waiting for it to fill up between spirts, we are making some great progress.  

    Going to do a light sand today with 300+ grit paper and finish it off within the next few days.
  • Specialist · Plano, TX · Member since 2020 · 2k+ posts · 861 votes
    6y

    @Adam Sharp great use of your time. And they look great as well. Keep up the great work. 

  • New to Real Estate · Denver, CO · Member since 2020 · 21 posts · 9 votes
    6y

    So cool!

  • Rental Property Investor · Charlotte · Member since 2019 · 70 posts · 34 votes
    6y

    @Adam Sharp Floors are on point, they look very similar to the floors that my husband installed in our property. We are also looking at painting our kitchen cabinets and installing new countertops, the current countertops are green. Have you decided what countertops you are going with? I'm shopping around, looking for something affordable, but also something that will last in a rental. 

  • Investor · Seattle, WA · Member since 2015 · 55 posts · 33 votes
    6y

    @Jessica Franco

    Hi and yes! Floors are great. Will def be going back to these. The LVP has underpayment attaches and my only regret is not adding another layer to absorb some of the impact. I think it would feel better to walk on and cover up some imperfections if I would have added another layer separate from the LVP itself.

    As for counter top I’m going w Home Depot solid surface. The laminate option was $600 vs SS at $1000 so almost double the price. I’m going w solid surface for a few reasons

    1. Higher end looking color/pattern selection

    2. No seams

    3. Durable durable durable. Laminate can’t take using the surface as a cutting board which renters are bound to do - this is my main reason - not having to replace this piece

    4. Repairs if necessary can be done in small parts be digging out the damage, melting, and pouring new coin pound into the effected area.

    5. SS feels better and will attract a better sales price / better renters - whichever direction go

    Hope that helps. Still waiting on covid pause to free up the measurement team so I can get me done and then lay the backsplash.

Join the conversationCreate a free account to reply, vote on answers and follow this thread.